mold questions for redman

stanger1944

New member
Joined
Apr 9, 2012
Messages
209
Location
LA Lower Arkansas
redear said:
haven't made any more brass pins for the molds lately as the gills are on the beds and have been fishing for them. Tiny 1/64 threadneck jigs with a crappie nibble has been working good. need to find a little ball bearing the size of a 1/64 round head so I can make a mold for that.

May sound like a dumb question, but here goes anyway. What do you do with the ball bearing, heat the aluminum blocks and the press the ball bearing between them or what?
 

Fatman

Active member
Joined
May 1, 2011
Messages
10,524
Location
Northfield, Vermont
Red if you go that rout you may want to make your sprue pour spout alot smaller - I think the lead will hard too much for a long one. Plus do it the easy way see if one of your buddies has one and use that, you wouldnt have to worry about where your hook slots would end up.
 

redear

Active member
Joined
Jun 24, 2010
Messages
1,297
Location
Waverly, Va.
stanger, you just press the ball bearing between the two aluminum blocks, no heating required, my 4 ton bottle jack will do the pressing. fatman, the ball bearing will be alot easier to press than the last one I did. the hook slot will end up perfect. I will tape the ball bearing in place with cellophane tape, and do the first pressing, then after I'm done with the head cavity, I'll tape a hook exactly where I want it, and press that too. will always relieve the hook bend area with the end mill bit, and would really like to get a 1/8" end mill bit for the hook eyelet area instead of using the drememl tool. fatman, yea, I see what you are saying about the sprue hole area, we will just have to make that channel shorter, shouldn't be a problem, just a little planning. I cought 42 gills today on a 1/64 threadneck kiptail jig , black and yellow with red thread no paint, and a white crappie nibble on the hook, 2 lb. line.
 

redear

Active member
Joined
Jun 24, 2010
Messages
1,297
Location
Waverly, Va.
went to making brass pins this evening and shaved the first one down too far so that was not usable, the second try is better, and I'm taking it easy on this one being careful with the fit. I found a small bearing I had and busted it open to get at the little ball bearings, four out of six went who knows where, lol, and I ended up with two for use as a blank. they miked out at .150 and my 1/64 heads mike at .155 so these blanks should make a head a little less than 1/64 oz. going back to work tomorrow, vacation is over.
 

redear

Active member
Joined
Jun 24, 2010
Messages
1,297
Location
Waverly, Va.
thanks crappiehappy,
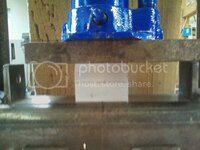
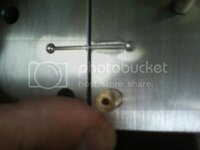
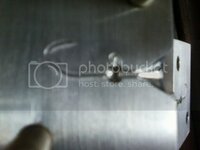
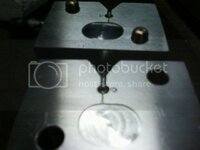
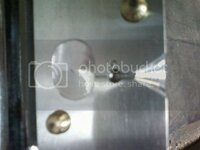
pic one is the mold in the press being pressed, can't remember weather it was a hook or the ball bearing I was pressing, you can see the little hole made when I pressed the tiny drill bit to mark the sprue hole. pic two is the mold halves showing the head cavity and the sprue hole left by pressing the drill bit. the mold halve on the right still has the bulges from making the sprue hole the mold halve on the left has already had the bulges sanded out. pic three is showing a mold halve after pressing the hook and with the sprue hole finished by countersinking a hole for the pots pouring spout. pic four and five shows the mold pretty much finished, with the hooks bend area shaved down by my mill/drill machine, this could be done with a drill press using a 1/2" end mill bit only difference is I can move the mold back and forth with my machine elongating this shaved area. only thing the mold needs now is to shave the area down where the hooks eyelet is, I'm gonna waite till I get a 1/8" milling bit for that so I can make it nice and pretty, the other thing is to put a hinge on it and handles but it doesn't have to have that stuff to operate. notice how I made a new pair of much shorter brass pins for the mold. longer pins for pressing , shorter ones for pouring to make the mold easier to separate.
 

Fatman

Active member
Joined
May 1, 2011
Messages
10,524
Location
Northfield, Vermont
Looks great RED!!!!!!!!!!!!!! Can't wait to see the samples come out of it!!!!!!!!! With the size of the block would it be just as easy to make it a 2 cavity mold??
 

redear

Active member
Joined
Jun 24, 2010
Messages
1,297
Location
Waverly, Va.
fatman,
It would be no problem making a 2 or 3 cavity mold as long as the mold was long enough, especially with these tiny heads. I will probably make a 2 cavity mold this next time around with the little 1/70 oz. or so jig fly that I'm wanting to do. probably put one cavity on top and one on bottom of the mold with the hook laying horizontal, that way the sprue hole can access the bottom of the jighead, which would be better for this project. yesterday I put the long brass pins into a new pair of mold halves and they will be just fine, am now grinding the ends of the mold halves flush just they are pretty. guys, this last mold was pressed without even using anything to hold the mold still while I pressed it, and I had no problems at all, once you put just a little pressure on the mold with that jack, it ain't going anywhere. I also picked up a couple brass hinges today and a 6x32 drill bit and tap for the mounting screws. just doing a little bit each day with this.
 

redear

Active member
Joined
Jun 24, 2010
Messages
1,297
Location
Waverly, Va.
I tell ya, cutting the mold halves and drilling them for pins ahead of time and just stock piling them to me is a better way to do this, it just makes the job seem less overwhelming when you get the notion to press something.
 

Fatman

Active member
Joined
May 1, 2011
Messages
10,524
Location
Northfield, Vermont
yeah well slow and easy sounds like the ticket!!!!!! You sure as heck don't want to screw one up by trying to do it too fast. Here's a question for you?? Can you press a mold out of an existing jighead???
 

redear

Active member
Joined
Jun 24, 2010
Messages
1,297
Location
Waverly, Va.
fatman,
a blank would have to be made out of steel to copy the jighead, this pressing method no doubt would work better with a round or conical head I think, and the larger the head, you would probably need to go to a softer aluminum than what I have now. I may be able to press a 1/16oz. head but haven't done it yet with this hard alum. 1/8oz, I'd opt for a softer alum. It can also be tough to control how the blank is pressing too, as I found out with that flat head, but I saved it by realizing what it was trying to do. so the answer to your question is yes probably, alot has to do with the shape of it and how hard it would be to make the blank, and how conducive the shape would be to pressing. what head are you thinking of? let me guess, is it the rockaroo style that redman likes? lol I don't think that one would be a problem. I still need to get a few milling bits, and maybe a softer 6061 temper aluminum stock. And yes I can mike, rather measure the head with a mic. and use those measurements as a guide for making the blank, but wouldn't want to get into trouble with someones design, I guess if we werent selling the jigs it might be ok.
 

redear

Active member
Joined
Jun 24, 2010
Messages
1,297
Location
Waverly, Va.
I think I found a hinge at the hardware store that might work for the molds, and some stainless machine screws in 6/32 to hold them on, as well as a 6/32 tap and a size #36 drill bit for the pilot hole. Probably use a long 1/4 or 5/16 dia. bolt to make the handles. already have the drill bits and taps for those unless of course Iv'e hid'em from myself, which happens alot in my shop. lol don,t know whats goin on but all the sudden I have mice in the shop, I mean they come out and watch me work! so I'm puttin traps down, got one already.
 

redear

Active member
Joined
Jun 24, 2010
Messages
1,297
Location
Waverly, Va.
got home from work tonite and went out in the shop and worked on my little fly jig mold, these baits are really small with about a 1/70 head on a fly hook size 10 . decided to makes two cavities on this mold, one on top and one on bottom, positioned horizontally, so I'll be able to pour one and then flip the mold over and pour the other too, I wouldn't press a larger head like this but the tiny ball bearing presses very easily so I figured what the heck. I pressed both cavities and now the pins need to be knocked out of the mold so I can sand the bulges out, then press the cavities again as well as the hook. the hook eyelet recess will actually be a hole deeper than the other molds because the eyelet on these fly hooks is bent a different way. since you all have seen the process a couple times now, may hold off on a photo untill I have a finished mold to show.
 

Fatman

Active member
Joined
May 1, 2011
Messages
10,524
Location
Northfield, Vermont
Red

Sent you another PM and it was on a different style of jighead but you really blew that theory out of the water!!!!!!! LOL But not a problem, I see what you meant now. Thanks!!!!!!!!
 

redear

Active member
Joined
Jun 24, 2010
Messages
1,297
Location
Waverly, Va.
been working on the fly-jig mold and pressed the hooks last nite, shoulda nipped the hooks eyelets off before pressing them, cause when I pressed them they twisted and snapped off instead of penetrating the alum, the hooks shape was allright tho. I think they will be ok when I'm done too, just won't do that again. just ordered some milling bits and some metric drill bits that are just slightly smaller than 1/4" so I hope that'll save me alot of time making pins. the 1/8" milling bit should make it easier to shave the hook eyelet reccess down and make it look alot prettier than using a drememl tool. winning the war on mice in the shop , seven in tthree days.
 

redear

Active member
Joined
Jun 24, 2010
Messages
1,297
Location
Waverly, Va.
recieved some drill bits and milling bits from victor machinery yesterday and workrd on the new mold some more, shaving the hook bend area down so it'll accept a range of fly hooks. will make a couple shorter brass pins for the mold next, these will be the pins that stay with the mold, and they will only stick out 1/8" to 5/32" or so. the little 1/4" diameter milling bit I just got really works better on these small molds than the 1/2" one Ive been using, can get it into tighter places. I don't know why I always start a new mold before putting hinge and handles on the last one but I'm gonna have to slow down and rig the three molds up that I have so far.
 
Back
Top