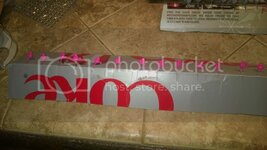
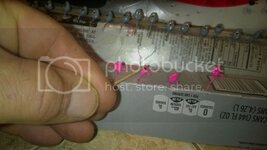
I have come up with a method for getting 3-D eyes to stay stuck without resorting to epoxy. Epoxy works great, but it has a short working time (or long drying time) and you have to be careful how you mix it because it gets bubbles. My method takes less work and results in eyes that will stay on practically forever. This is what you need:
3-D eyes
Super glue gel
Duco Cement (available at Dollar General for about $1)
Acetone (nail polish remover)
Squeezy head cement bottle with needle tip
Word about the materials:
It doesn't matter what brand of super glue gel you use, but you MUST use the gel with a precision tip bottle. Regular superglue will run all over the place.
Duco Cement used to be available in bottles, but now it seems they only sell it in tubes. You can't use it straight from the tube because it's VERY runny and the tubes have a mouth that is way too big for jigs. Thanks to Fatman for turning me onto this wonderful product.
Preparation:
Take your applicator bottle and fill it about half full with Duco Cement. Add a few drops of acetone to thin it out enough so it will flow easily through the metal needle. It will take some practice to get the consistency right, but as long as the bottle is easy to squeeze it doesn't matter.
I find it speeds up the process if I peel the eyes off the sticker sheet and stick them to the side of the index finger on the hand I'm holding the jig with. I'm right handed, so I use my left hand.
Directions:
Put a dab of super glue gel in the eye socket.
Peel the eye off and stick it in the socket.
Repeat on the other side.
Hang the jig to let the superglue dry for a few minutes and move onto the next jig. I usually do about 25 at a time and find once I'm done with the last jig the first one is ready for the next step.
Once the glue is dry enough to keep the eye in place (it doesn't have to be fully cured) grab your bottle of Duco Cement and give it a good squeeze while upright. You want the suction when you let it go to be enough to draw it back through the needle and into the bottle. Otherwise it will continue to flow out the tip.
Tip the bottle over and use the needle to apply the thinned cement around the edges of the eye. Try to make it as smooth as possible, but if it's not smooth don't worry. Repeat on the other side.
Hang the jig and move onto the next one. The cement will be dry enough to handle the jig in about 10 minutes, but until it fully cures it will be a milky white color and kind of crusty looking. Full cure takes about 24 hours. Until then you will wonder if you've ruined your jigs. Fear not! It is crystal clear once completely cured. You can put them in a bin, tie on them or whatever while waiting for them to cure.
I used to just use super glue gel, or super glue gel and clear coat nail polish. But after awhile the eyes would fall off. Since switching to this method, I have never had a jig lose its eye, even after hitting rocks. I think it would take a bomb to dislodge them. I have caught 200+ fish on one jig and the eyes were still on when I lost it in a tree.


