Crappie_Pop
New member
- Joined
- May 26, 2010
- Messages
- 5
I had posted this on Crappie.com and have been asked if I'd post it here on JigCraft.com so here it is.
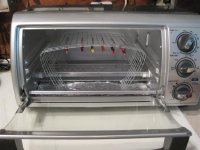
After going through the frustration of what to use as a curing rack I decided to build my own. I used ½” X ½” hardware cloth. I took some quick measurements and started cutting and bending. I did find that after I cut the wire it left some jagged edges, so I put a small grinding wheel on my Dremel® tool and knocked off the rough spots.
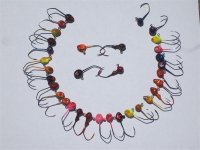
As you can see this rack will hold a lot more than I had on it. The nice thing about it is the sides and top are usable.
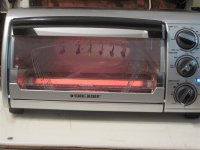
I cured the jigs shown at 350 ° for 15 minutes. There is practically no cool down period. This toaster oven is the same on we use in the house, however I did line the crumb tray with aluminum foil, just in case I has some excess powder paint that dripped.
I hope this might help other who have the same frustration of what to use as a curing rack.
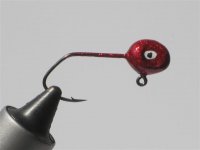
A lot of the colors shown are my custom mixed powder paints. I really like the Black/Ruby Slipper/Glitter.
After going through the frustration of what to use as a curing rack I decided to build my own. I used ½” X ½” hardware cloth. I took some quick measurements and started cutting and bending. I did find that after I cut the wire it left some jagged edges, so I put a small grinding wheel on my Dremel® tool and knocked off the rough spots.
As you can see this rack will hold a lot more than I had on it. The nice thing about it is the sides and top are usable.
I cured the jigs shown at 350 ° for 15 minutes. There is practically no cool down period. This toaster oven is the same on we use in the house, however I did line the crumb tray with aluminum foil, just in case I has some excess powder paint that dripped.
I hope this might help other who have the same frustration of what to use as a curing rack.
A lot of the colors shown are my custom mixed powder paints. I really like the Black/Ruby Slipper/Glitter.